Our How-To Beginners Guide To Sharpening Drill Bits
A lot of DIYers believe in having the ‘right tools for the job’ and while that is a good approach, how often do we forget to maintain the tools we do have?
Constantly replacing tools when they aren’t as good as they used to be can be a costly exercise in itself.
Is it actually worth sharpening drill bits? Sharpening drill bits can take time, more time than it takes to go to the shops and buy a new set so why should you bother? Quality drill bits can be expensive so it seems a waste to throw them away, when, with a bit of time, they could be as good as new.
The process of sharpening a drill bit can be quite quick, let’s not forget it’s good for your wallet and good for the environment. So there are lots of good reasons as to why you should learn this skill!
Below we have three different ways for you to sharpen your drill bits without ever having to leave your shed, garage or man cave!
Ready to go?
Method 1: Sharpening drill bits using a bench grinder
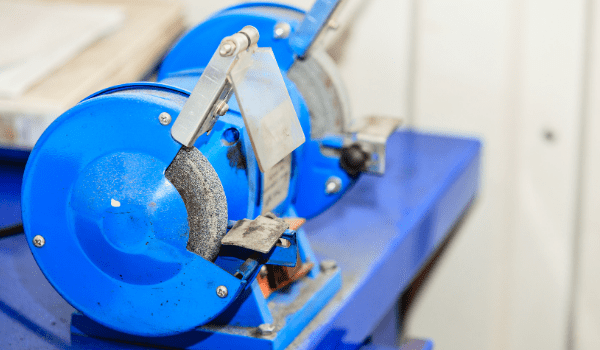
A bench grinder is considered to be one of the most effective ways to sharpening drill bits. Once you have the knack for doing it, it can become a really quick and simple job.
To start you are going to need a grinder, a workbench, some cold water and safety goggles.
Make sure to create enough space on the workbench, you will want to be able to stand in front and have sufficient space to be able to move your elbows and arms.
Remove anything you won’t be needed away, especially any flammable items away from where you will be grinding. That’s really important!
Secure your bench grinder to the workbench, again, ensure you have enough space so that you can be in front of it and have enough space. Your grinder shouldn’t be able to move, it should either be bolted or clamped down firmly.
Depending on what type of grinder you have, you may have a container on the tool itself for quenching water. If you do then that’s good, just make sure you have some cold water handy. If your grinder doesn’t have a container, that’s no problem. Any container with cold water will be great.
Take the drill bit in both hands, ideally, you want to be able to move the drill in any direction. This can be achieved by using the tips of your forefingers and thumbs.
One hand should be close to the tip of the bit (around 1 inch is good), the other hand should be placed on the shank. What is important is that you feel comfortable, the more often you do this, the more comfortable you will feel.
Tip: Do not wear gloves - these can get trapped in the wheel and cause injury. Do wear eye protection!
Switch the grinder on and ensure you are holding the drill bit securely. You will want to hold the drill bit so that the tip is around 1mm from the wheel of the grinder.
A good guide of the angle you will need is to use the existing drill bit edge. It will most likely be around 60 degrees or so.
Allow the drill bit to make contact with the grinding wheel, you will want apply some pressure to get it cleaned up a bit.
Tip: Holding the drill bit against the grinder will cause the bit to get hot so only hold it there for short periods of time.
While you are letting the bit cool, you can check its face, it should be cleaning up. You’re goal is for a clean cutting lip.
The drill bit cutting face should be at 118 degrees, you can achieve this by using an angle gauge or simply put two hex nuts together, you can hold the drill bit between them and that will you get you angle.
The hex nuts work because each of the six sides are set to 60 degrees.
Once you are happy, you can repeat this step on the other cutting face. Your aim is to have both cutting edges at the same length and ideally to be symmetrical.
The best thing you can do is to take your time, do it in stages and use the water to keep the drill bit cool.
Tip: After every grinding dip the drill bit into cold water, this will keep it from becoming too hot to hold.
Method 2: Sharpening drill bits using a Sharpening Tool
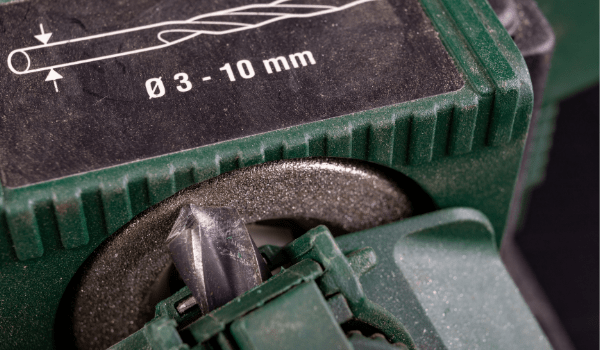
If you don’t want to follow the above steps or you don’t have access to a grinder, there is an alternative.
This method can actually be quicker than using a grinder and in some ways, it is easier.
There are tools out there which are specially designed to sharpen your drill bits. With plenty of different models there is bound to be something to suit your budget and need!
Each machine comes with instructions and is fairly easy to get to grips with.
Method 3: Sharpening drill bits using an angle grinder
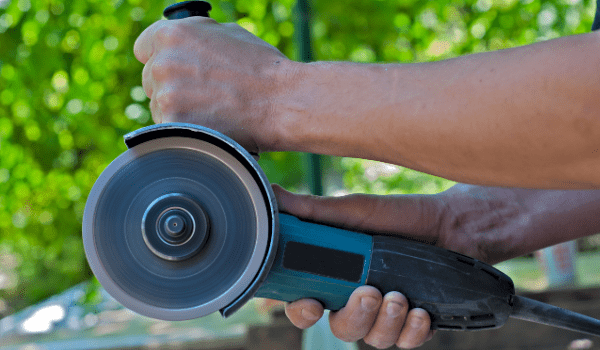
The final method we will cover, using an angle grinder. This method can work really well, however you may find the job easier if you have a jig.
A jig only needs a scrap bit of wood so have a hunt around and then we can get to it!
When it comes to making the jig, you will need to make it relating to the drills point angle that you are intending to sharpen.
As an example, if the angle is 135 degrees, then you will need to make a 67.5 degree line onto the jig. Then you can drill the hole into the block following that line.
For those wondering why we go through this step, it ensures that the drill bit will align over the blocks surface.
Now you have your jig ready, place it onto a bench vice and ensure that the drill bit is correctly attached.
Hold the drill bit in your hand and apply sufficient pressure against the hole. Grab the angle grinder with your free hand.
This should allow for the drill bit to be parallel to the surface of the jig.
Once you are happy with the set up then you can switch on the grinder. You will need to apply some pressure, but only a small amount, against the drill bit.
You can then move onto the other side in a 180 degree rotation.
The relief of the drill bit will also need to sharpened, to do this you will need to take it out of the jig and place it into the bench vice.
This is probably the most challenging element of the task so do try to stay focused.
That’s it, three different ways to sharpen your drill bits and save you some money too!
Which method will you choose?
Related Questions

What are the different parts of a drill bit? The end that makes the hole is called the ‘tip’, this is the part that often becomes dull and needs to be resharpened.
The length of the drill is known as the shank and the grooves along the shank are known as the flutes.
Can you sharpen cobalt drill bits? The great thing about cobalt drill bits is they are highly resistant to heat so they can withstand a lot of use because of this, they are ideal for sharpening and using again. A grinder will be able to get the job done best.
Can you sharpen drill bits with a file? You can use a file to bring your drill bits back to life. It does require a set of nimble fingers and patience but it can be done!


